how i documented 2015 and why i'm doing it again in 2016
What is "scrapbooking success"?
This year has been my most successful year as a scrapbooker!
Pretty bold statement for a girl who has been scrapbooking for nearly 22 years. And besides -- what does "success" even mean in scrapbooking anyway? Well, let's talk about that for a moment, shall we? Success is 100% subjective. What success means to me in business or family life might mean something different than what you deem a "successful life." Same goes for scrapbooking. To be a successful scrapbooker is whatever you want that to mean. Really -- it's true!
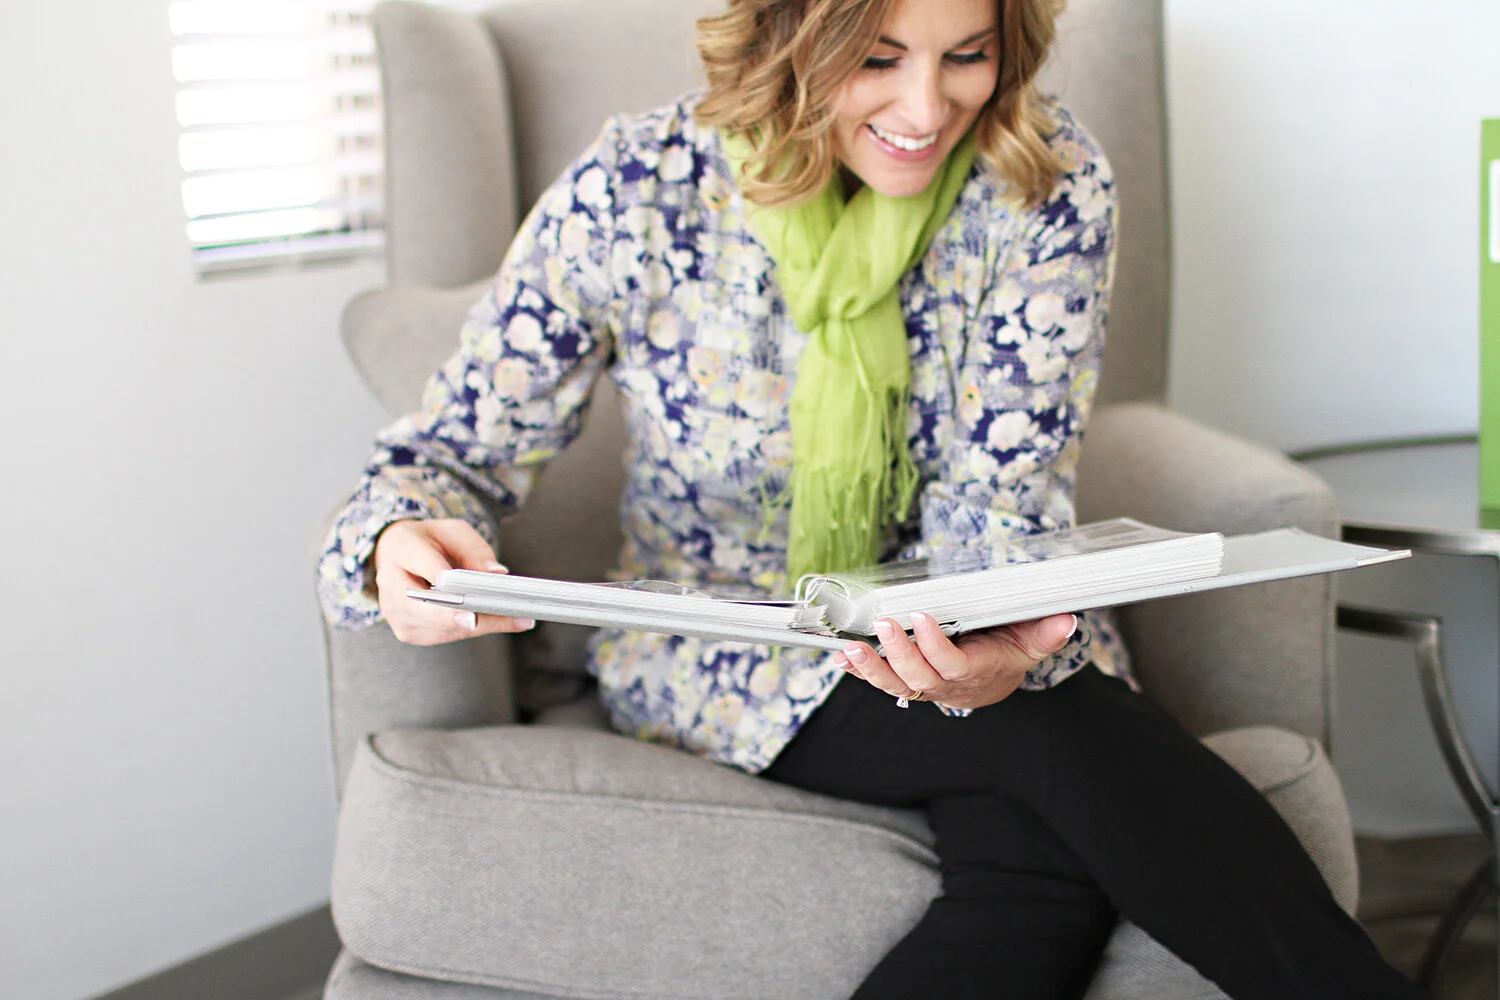
My personal definition of successful scrapbooking means that I've done something to get our pictures into a tangible album (or albums)... something that we can actually hold in our hands. Regardless of what kind of scrapbooking you do, you should be very proud of the fact that you are doing something with your pictures! I am proud of you! If you're not yet a scrapbooker, or you've put that on hold for a number of years, do not despair. There is a very simple approach to getting it done and it's called Project Life®. (You saw that coming, right?)
For all our newbies, check out this short & sweet video that gives you an overview of how it works.
Year after year after year after year, I have been a faithful scrapbooker in one form or another. Back in the day, it was the traditional, creative approach for me (and pretty much everyone else who called themselves a scrapbooker). It was all about layout design and color choices and design elements and details. It was tools, techniques, and embellishments. I would call those successful scrapbooking years because I was doing something with my pictures ... and I loved the creative process!
In my personal evolution, through every phase and approach I've tried, I can look back and confidently say that I loved every phase... for different reasons. I've said it before and I'll say it again: I'm a big fan of evolution! Our family has dozens of scrapbooks in our home with printed pictures that are safely displayed and ready to be enjoyed at a moment's notice. I'm proud of every one of those completed scrapbooks -- and even a few that aren't quite complete. I love being a scrapbooker! I have no plans of going back and "re-doing" anything that I've already done.
So all this talk of my "scrapbooking success" through the years... what makes this year any different? Why is this year considered my "most successful year" in getting our photos in scrapbooks? I'll tell you why. I have been able to keep up all year long. Why does this matter? Because in years past, I would keep scrapbooking to-do lists of each layout I wanted to do, and I would chip away at that list whenever I could. I felt "behind" all the time. This year, there were never any scrapbooking to-dos. There were no lists. I just DID it! Each week I spent about 10 minutes making a layout (seriously) and that's it! Because of this, the memories were always FRESH on my mind and I spent way less time actually scrapbooking... which allowed me more time to focus on other important aspects of my life, like family ... and sleep!
Put another way... what has made this year my most successful scrapbooking year yet, is that the stress related to the process dropped significantly. Like... no stress, you guys. None. As much as I enjoyed past approaches, there was always an element of stress... pressure I put on myself. (We women are good at doing that, am I right?)
Like I said... stick with me. I'll dive in and explain it all!
to each his own
Wait -- quick disclaimer! It is so, so, so important for me to emphasize something before I carry on. There is no such thing as "one size fits all" in this hobby. What I'm about to share works for me. Everyone is different. This is not a post with a "you should do this" or "this is the best way" type of message. This is a post to simply share what works for me, and I'm sprinkling in lots of tips that I hope will be helpful to you, regardless of your personal approach to scrapbooking. I want each and every one of you to have scrapbooking success!
I'll be talking quite a bit about the Project Life App -- because that's my go-to way of scrapbooking these days. I understand the app isn't for everyone. I celebrate the fact that we have such a wide variety of ways to get pictures into albums. There's traditional, creative scrapbooking, and the physical version of Project Life (which has also become known as "pocket scrapbooking"), digital scrapbooking, mixed media, smashbooking, chatbooking... you name it! Lots of ways to scrapbook and that's awesome! I get it, friends. I've been around in this industry as long as it has been an industry. It's all good.
I just know that as you read this today, you'll pick up tips, no matter what kind of scrapbooker you are or want to be. Promise me you'll stick with me until the end of this post. My whole goal is to inspire you and if you close out of this window with even just one a-ha! moment or something new to try, I'll be happy that your time with me was well spent.
NOTE: I will be focusing on the annual family yearbook that I do. I also have albums for each child that hold all of their "stuff," but that really is another topic for another day and the last thing I want to do is overwhelm you right now.
Oh, did I mention this will be a long one? Now is a good time to grab your favorite beverage and curl up. Get cozy. I'm serious.
My husband says I talk too much ... sometimes. What??
Okay. Moving on.
my daily routine
I take pictures every day. I don't overthink it. I just... take pictures. Like I've been taking pictures all my life. Some days there's just the one shot. Some days bring about dozens of photos. It depends on what's going on.
TIP #1: 99% of the pictures I take are with my iPhone 6 Plus. This simplifies my life in a hundred ways and I'm just as happy with the results I get from the device that fits in my pocket as I am with the pictures that are produced with my dSLR.
TIP #2: 99% of the pictures I take are in horizontal (a.k.a. landscape) mode. This simplifies my scrapbooking efforts because I'm eliminating time that I would otherwise need to invest in page design options.

So what should we be taking pictures of? Well... it's certainly easy to remember the big events -- you know, the birthday parties, trips, and holidays. That's the more obvious stuff. It's the everyday stuff that is easily overlooked and yet, the "little things" are so much a part of what makes up who we are! What about pictures at work, around your home, stuff you do out & about? Think about the people you love. When's the last time you've taken a picture of that treasured friend, that favorite neighbor, the teacher who has made a difference in your child's life? We should snap pictures of the stuff we do, our habits, and our hobbies. And you need to be sure you are getting in front of that lens too, my friend. The list is endless, but you're getting my point.
Take pictures of the pieces that tell the story of your life.
TIP #3: Sometime (not right now while you're reading all of this)... watch this video that is packed with inspiration that will get your wheels spinning about what kind of pictures you can take to capture your everyday.
TIP #4: Think ordinary! Challenge yourself to take at least one picture each day for a week that you feel is an "ordinary" part of your life. Could be a particular place, thing, or activity. But it's ordinary. Perhaps mundane. Maybe you even think it's un-interesting! Gasp! I assure you the details of your life are more interesting than you think.
TIP #5: Take less pictures. Wait -- what?? In photography, there is often an emphasis on shoot, shoot, and shoot some more. I totally get why. The more you shoot, the more experience you gain, the better you get. As a lifetime documenter, I have reached a point where on a day-to-day basis, I actually try to take less pictures. I am more intentional about the shots I take. And this is turn means less pictures to sort through and this means I'm less overwhelmed in general. So... it works for me.
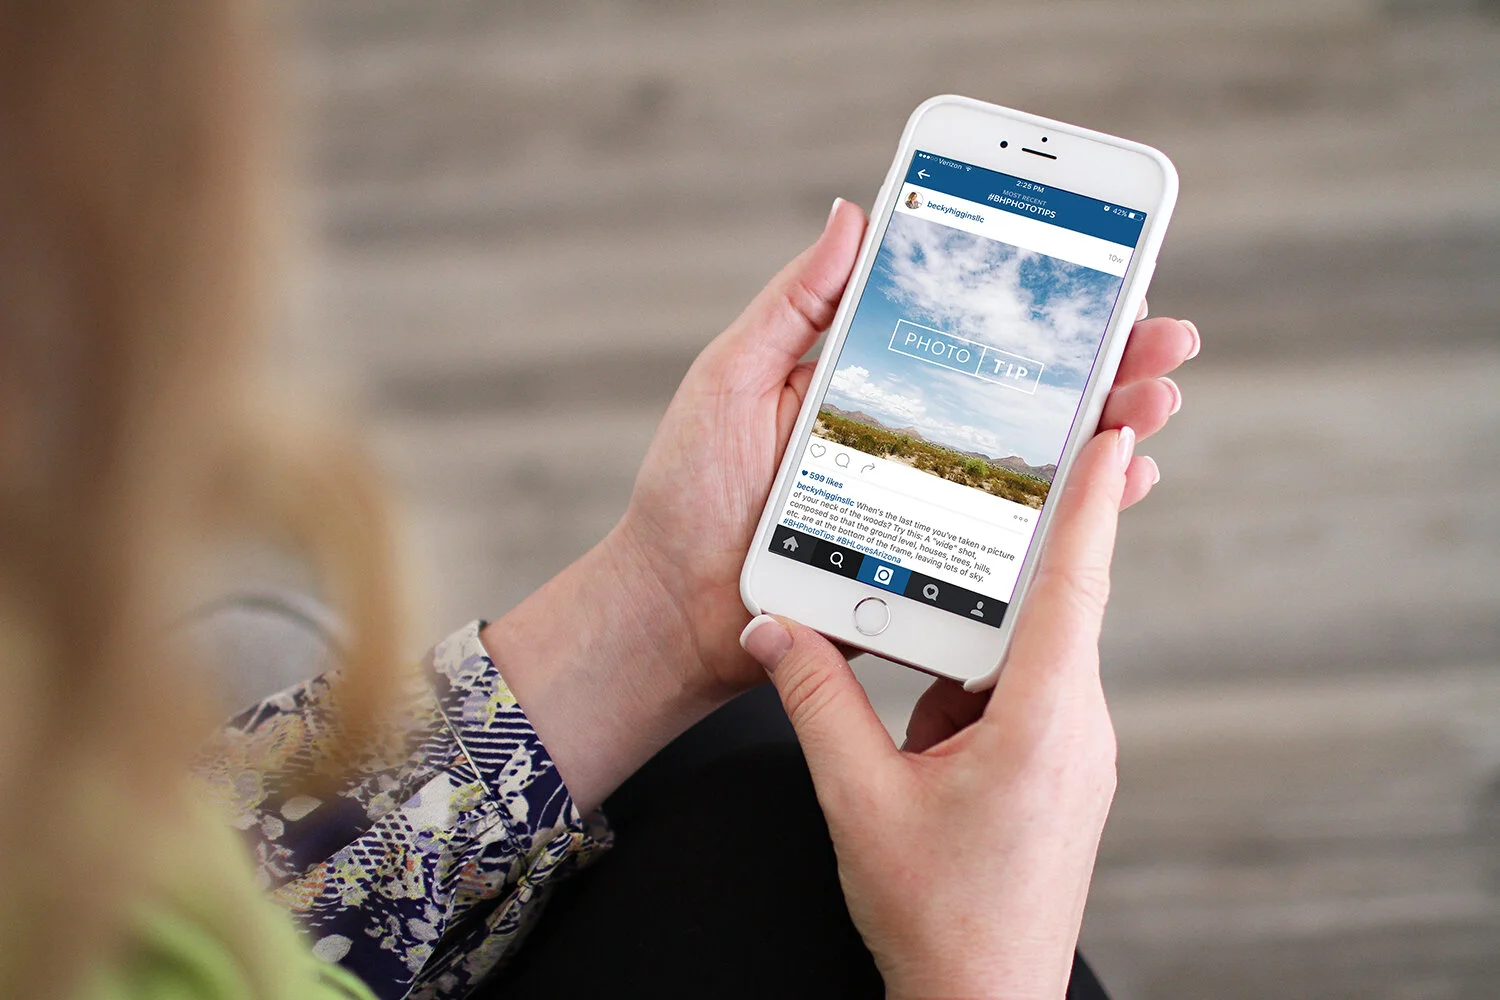
TIP #6: I hope you're following me on Instagram. If not, today's a good day to start. I am very intentional about what I share and everything really comes back to cultivating a good life and recording it. One of the hashtags I use regularly is #BHPhotoTips and this is how I share ideas on ... well, photo tips.
So at the end of every single day, I have this little routine with my pictures. I go through the Camera Roll on my phone and I review the pictures from the day. I eliminate and delete right then & there (if it's necessary, which... it's not always necessary).
Also right then & there, I take a minute... or a few minutes if there are a bunch of pictures... and I give my favorites a quick edit. Now, I'm not suggesting that everyone edit their pictures. This is a step that anyone can choose to eliminate. I choose to edit because this is SO quick, SO easy, and I love that my pictures just simply look better when I take the 10 seconds that it takes to make it look better.
My go-to photo-editing app is called PicTapGo and it has been for a while. More on that in this blog post I did awhile back. You can read that later. Stay focused with me. *wink*
So I'm taking pictures pretty much daily and perhaps you are too. Got it. What next?? I scrapbook!
weekly scrapbooking
Ah. It's getting good now. This is the part that makes me giddy because of just how EASY it is! For me, I need simple and quick. Simple and quick = DONE. I say this all the time because it's true (for me -- and maybe for you too?)!
As mentioned before, I use the Project Life App. I can't go any further without letting all of our Android friends know that we are getting close to having it available for you as well! This is a question that we answer every single day (literally). The timeframe is currently looking like a January/February 2016 release. If you happen to be curious about why Android needed to come out later than the iOS launch of the app, this post is for you.
I love all forms of scrapbooking, but not all of them resonate with me personally right now -- and that's okay. Remember all that chat about evolution earlier? Right now is different than 5 years ago and 15 years ago. And right now, I'm all about the ultimate simplicity. Right now, you might be really into art journaling or scrapbooking digitally on your computer or slipping photos into pockets with the original / physical version of Project Life. It's important to connect with what YOU want to do.
THE BIG SECRET
You know what will lead to your greatest scrapbooking success? Choosing the method that makes sense for you... because you love it, you connect with it, and doing it that way makes you WANT to scrapbook!
Me? I love the app! It's my jam. I can do it anywhere.
TIP #7: Not familiar with how the app works and want to see before you drop $1.99? You can catch that demonstration video here.
This is how I use the app: At the end of every week, I get cozy (I'm usually cuddled up in bed) and I make two pages that summarize the past week. I open up the app and start a new page. There are always a couple things I do straightaway before pulling in any pictures. First of all, "Design A" is the page template that comes up by default when you go to begin a page. I stick with that most of the time to keep things simple. I instantly change all my corners to square (they are defaulted to be rounded, but square is my personal preference for app pages) and I add the title card, which is always the week card from the Project 52 collection -- my personal choice for documenting 2015. I always put it in the top left "pocket" of the left page, just to be consistent. I also add that week's dates to the title card and then I'm all set up to work on the page.
TIP #8: To change your corners (square or rounded) in the app, when a page is open you see the little layout icon in the top left corner? When you tap on that, a row of color options shows up, if you want to change your background color (I stick with white, personally), and a row of page layout design options shows up across the bottom. Looking in the top right corner, you'll see the icon to tap to change your corners.
TIP #9: Is a week Sunday to Saturday? Or Monday to Sunday? Your choice, friends. I have done both. For 2015, I did Monday through Sunday because it keep the weekends "together"... and I like it. I'll be doing that again for our 2016 family yearbook.
Establishing a routine -- a regular time to scrapbook -- is a beautiful thing. Doing this gives you something to look forward to and it also makes it really easy to remember to get it done in that busy life of yours. Daily, weekly, monthly, twice a year... whatever works for you!
TIP #10: Set a personal goal for regular scrapbooking that you want to do. Put it on the calendar (I even have it on my calendar as a repeat item for every Sunday). Make it a priority.
No one just "has" extra time laying around. Anything that is important to us will happen because we make it happen. It's no different than exercise, making homemade meals, dating our spouse, or making time to pray or read. Also... when something isn't a routine, it becomes a bigger deal in our minds... which makes it easier for us to procrastinate... which increases our chances of just throwing in the towel altogether. I know you know what I'm talking about. A lot of you are nodding your heads right now.
TIP #11: If you are scrapbooking with physical materials, do you have a designated place in your home where you can store, organize, and spread things out? Do your best to keep everything in one place so when it's time to get out the supplies and work on pages, you're not digging things out from all over the place.
Back to my weekly layouts. Because I choose to document week by week, which is a very chronological approach to scrapbooking, and because we know I'm not alone in this approach, we developed a collection of Project Life for last year that was called "Project 52". We made it available in physical, digital, and app formats. Really, you can do weekly scrapbooking with any collection you like, but I personally love the specific week cards and coordinating designs.
So the question is -- for those of us who are doing Project 52 again in 2016, will we have a new collection to work with? YES! I'm so thrilled to let you know that we've worked with yet another terrific designer to bring about another Project 52 collection... and just wait until you see it! More details and sneak peeks coming to the blog in a few days. This new collection was actually released in the app and in our digital shop today! While it's not available in physical format this year, those who really want to use these new designs in physical format can always purchase the digital version and print the cards that way. We provide print-ready versions of all the cards in our digital shop.
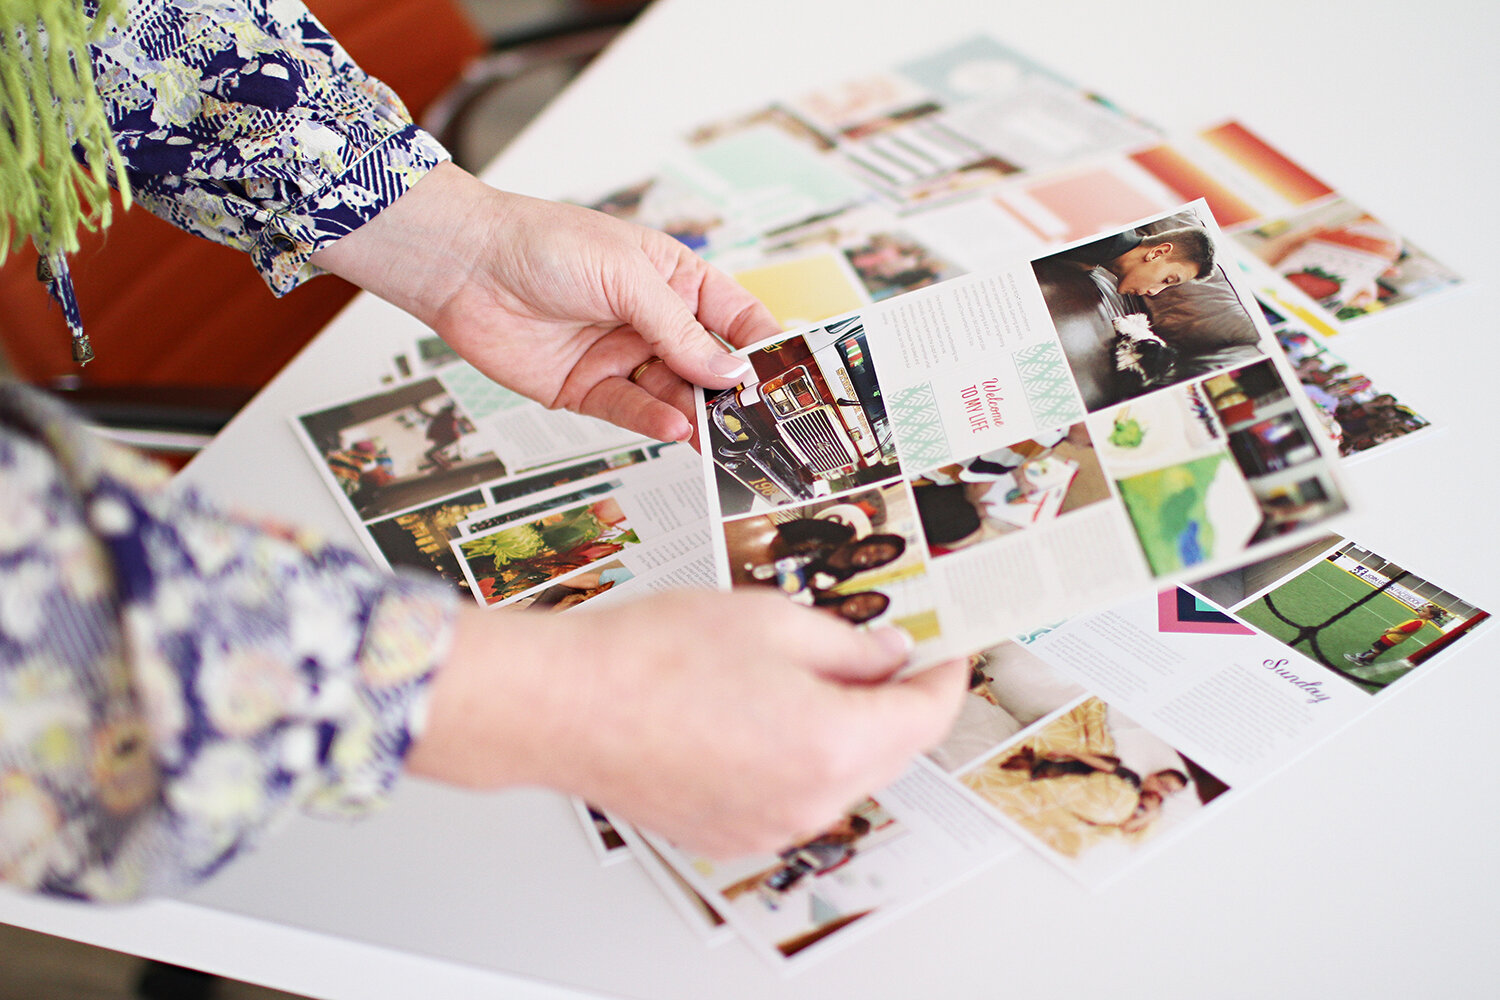
So each week, I make a left page and a right page by pulling in photos and journaling cards and filler design cards. I usually choose anywhere from 7 to 12 pictures to represent that week. More on choosing photos in a minute. I also add journaling. More on that in a minute as well.

The pages come together quickly because I'm not sifting through hundreds of pictures. It's just a week's worth. The memories are fresh. It's so fun!
Well what about if we travel or have some big event? Do I do extra layouts for special occasions? Actually... not usually. If I made a special layout for every "special occasion"... well, that would take me right back to the scrapbooking to-do lists I mentioned earlier. That's just so much scrapbooking (for me)!
So yes -- the birthday parties and weddings and vacations usually just work right into our weekly layouts. For example, see this layout here? It's another week in the life for our family, but it happens to be a week that David and I spent on a cruise with 5 other couples. It was week 44. I hit the highlights and didn't stress about trying to do a bunch of layouts about this cruise. After all, this is the family yearbook. Our kids won't care (more than a couple pages worth) to see loads of pictures of Mexico.
There are exceptions! Let me make this clear: I don't make this SUCH a hard & fast rule that I lose creative freedom. Once in a while, I absolutely allow for a special occasion to become an extra layout (or more) in the family album. And I love that.
Example: Europe! Our family visited England, France, Sweden, and Norway in the early part of our Summer 2015. Absolutely a big deal for our family. We were in Europe for 3 weeks and no way did I want to confine or limit myself on those pages. So I didn't. The layout below is one of 16 two-page layouts I made in the app of our time in Europe. I did them all during the downtime of our trip, which meant that the entire experience was scrapbooked before we even got home. (Have I mentioned how this app has rocked my world?)
But wait -- there's more! I didn't just stop there. I found myself falling into a creative photo project... somewhat of a visual scavenger hunt on this trip. For those of you who follow my social media, who remembers the circles? Don't know what I'm talking about? Jump on Instagram, search #BHCircles and ... yep. I did that. So fun! And those circle pages = 5 additional two-page layouts in our family yearbook.
So you see? I set boundaries to help myself and I bend the rules when I really have the urge. All of that works for me.
TIP #12: I mentioned that I use mostly page Design A, for simplicity's sake. Please understand that we have SO many layout options with Project Life -- physical, digital, and in the app! Whether you are working with horizontal, vertical, square, or a little mix... we have page designs and templates for all of it. Looking at the layout above from our visit to Paris, you can see that I was thrilled to be able to have one, large vertical photo as a focal point.
And by the way... when I do "extra" layouts, this is where I really tap into other Project Life collections that are not Project 52. This allows me to not only play with more designs that I love (we have so many great collections to choose from), but it also helps those layouts to "stand out" as different than our usual weekly layouts.
choosing photos
This is where many scrapbookers get stuck. Ugh. So many pictures to choose from! How do you do it? In this day and age, we've become so accustomed to an overabundance of imagery because photography has come such a long way in such a short period of time. Gone are the days that we pay for expensive film and have to have every picture developed (another expense). So we snap to our heart's content without any obligation to do a dang thing with those images... which results in hundreds / thousands of pictures sitting on our cameras, phones, and computers.
Deep breath.
Listen. This is not choosing who to marry or where we will raise our family. We're choosing which pictures to put in a scrapbook. You're not going to screw up, so stop stressing yourself out over these little choices. Know what I mean? The reason so many scrapbookers get so worked up about it is because... well, think about it. It's our pictures. They are so special and so personal and mean so much to us.
So that's just it -- choosing pictures is personal. I can't tell you which ones to pick, even if I were sitting beside you with that stack of photos. They're your memories, not mine. But let me try to help you just a few thoughts.
Since I'm focusing specifically on this family yearbook, one thing that helps me choose photos is keeping in mind the grand picture of what I'm trying to include. That is, the whole family! I want to be sure everyone is represented on a regular basis (but without actually counting -- that's a bit much).
TIP #13: Thinking about the scope of your project / scrapbook, choose pictures that will truly represent the experiences you are trying to preserve. If a child looks back on a scrapbook that is only spotlighting birthday parties, visits to the zoo, and that trip to Disneyland... they might have more of the feeling that that's what real life is -- a non-stop party! I so love to include our errands to Target and Costco, an occasional visit to the doctor, the bumps and bruises, what we do when we're just chilling out at home, the latest book someone read, our go-to after school snacks, what our team meetings look like at work, who last stayed in our guest room, where our dog likes to nap, the kids' favorite XBox games, the dog food that Crew spilled all over the kitchen floor, the huge organizational project we're working on in the garage. You get where I'm going with this. I know you do.
TIP #14: Think ahead 5, 10, 20, 50 years. When you think about the future and looking back at this scrapbook you're working on... what really matters to you? What do you think will be interesting then?
TIP #15: Think about your ancestors. Huh?? This is what I mean: If you inherited a scrapbook from your parents, grandparents, great-grandparents... what kind of pictures would you want to see of their life? Personally? I would prefer to not see a bunch of repeat pictures, which is why you won't see me making scrapbook pages with the same group shot but 14 versions because of different faces people made. Personally, I would think it's nice to see places that they traveled -- a sampling would be fine -- but I would want to see much more of their life at home. I would want to see their favorite little collections and their favorite things they cooked, the games they played, and their mode of transportation. Those would be interesting details and pictures to me.
What about pictures of nature? Oh, just one of my favorite things ever. You'll definitely find leaves and cactus and sunsets in my Camera Roll. But again -- thinking about the long-run, I'm not so sure our family will care to see hundreds of pictures like that. And yet, they're very much a part of me and very much a representation of where we live (that's another hashtag to check out -- #BHLovesArizona). So you know what I do? I sprinkle those pictures in here & there. But you won't find an overload of nature images in the family yearbook.
Ten layouts of a birthday party? Umm... not even sure the birthday kid will care to see that many pictures of one event, even if it's all about him, right? Again -- to each his own. No rights. No wrongs. Just giving you some things to consider as you ponder how to make photo selections.
Okay -- so then what about the rest of those pictures that you don't print or don't include in the scrapbook? What happens to those? Kinda feels like another topic for another day, with a lot of you who might have advice or opinions. I'll just speak for myself to say that we have ALL of our tens of thousands of pictures backed up and backed up again (I love you, Dropbox) and no one will probably ever care to view ALL of them, but they're there and they exist, and that's great. I am doing my best to accumulate a very healthy selection (the "best of" our photos) to be represented in our scrapbooks so if all the rest should ever "go away"... well, the world would simply not end.
journaling
By now you might be wondering why I didn't break this giant post into a few smaller posts! I assure you I have thought about that. But in the end, I love simplicity. And the little simplicity elf sitting on my right shoulder tells me that having all of this information in one place is important for reference, as a complete guide for anyone interested. I could have made this an online course and charged a fee. No thank you. I don't do what I do for gain. I just want you to scrapbook and feel completely successful doing it!
Onward and upward. Let's talk about journaling!
The words, the stories, the anecdotes... this is just as important as the pictures, folks. Truly. Remember how I asked you to imagine that you received an old scrapbook from an ancestor. What if that scrapbook, full of pictures, had no captions or explanations at all? Well, the pictures would be lovely... but they certainly wouldn't take on the same meaning for you unless you understood some of the details.
But I'm not a writer! I don't know what to say! And have you seen my handwriting??
I can practically hear your concerns, as if you were standing in the same room with me right now. Again -- I get it. I have talked with hundreds of scrapbookers over the years, face-to-face. I know the hurdles and the concerns and the things that stump so many of you. And because of that experience, I know better than to just say, "Get over yourself!"
Let's say you have put a scrapbook page together and literally, the very last thing left to do is write something on that page. You're looking at the pictures, but you're drawing a blank. Where do you even start?
TIP #16: Keep in mind that journaling in a scrapbook does not have to be intensive or extensive in any way. If you're just starting out, keep those captions short and sweet to just get a feel for at least a little bit of writing. No one is suggesting that you write a novel about any picture.
(Speaking of novel... kudos to you if you've made it this far in the blog post! *fist bump* for endurance - ha!)
TIP #17: Imagine you're sitting down and your scrapbook is in your lap and you're looking at a page. Now, imagine that you're not alone. Someone is sitting next to you. A friend, perhaps. Someone who cares about you, has an interest in your scrapbook, but they weren't there, they're not in the pictures, and they don't know what's really going on in the pictures. Imagine what you would tell them, face-to-face. Well, just like magic... those are the words, my friend! You just did the journaling in your mind. Now ... just write it down.
TIP #18: Picture the day that you're gone (I'm not being morbid; I just think it's important to think way ahead sometimes)... and your great-great-grandchilren are looking at the scrapbook. What would you want them to know? Again -- there's your journaling!
What about which voice to use? Are you writing to someone? About someone? First, second, or third person? Are you putting words in someone's mouth? For example, would you write "I was just so cute today!" when referring to your baby who can't even talk yet? No rights. No wrongs. Personal decision here.
Writing in first person works for me. This is why: First of all, that's how I talk! "I went to the store." "I felt elated when I heard the news." So it's natural to extend that way of talking to my writing style. I like to write like I talk. Seems easier yo. Also -- I'm the documenter. Unless I'm specifically getting another family member's perspective on something (at which time I'll be sure his or her name is with that respective journaling), if I'm the one writing, then they're my words and I'm not putting words in anyone else's mouth.
TIP #19: Make a decision about the "voice" you want to use in your scrapbooking and stick with that so that you don't have to go back to thinking about that decision over and over.
TIP #20: Quote your loved ones as often as you can. Even as the documenter, you can still get other voices in the scrapbook, and if you can't get others to add their own words, you can most certainly quote them. Sometimes this is the best journaling!
TIP #21: You guys! Did you know that you can use the voice-to-text feature (Siri) to add journaling to your pages in the Project Life App? Yes ma'am! And I use it all. the. time! When you are ready to type on a journaling card and your little keyboard is up, see your little microphone icon there near the space bar? YES! Try it! Best thing ever!! So much faster than typing it all out, and it's usually pretty darn accurate too.

TIP #22: Emojis are very much a thing right now. Use them in your journaling (in the app) if that's something you would normally do with your texting or social sharing. So fun. So pop culture. So going to be one of those things that is really dated years from now, so it'll be part of your time capsule -- and that's just awesome.
TIP #23: Because of the nature of Project Life page layouts (everything is in a "pocket")... I like to point out which journaling goes with which picture on a page. So most of my cards will say, for example "ABOVE" before I start the actual journaling (or BELOW, LEFT, or RIGHT). That way when you read the journaling, you know exactly what I'm referring to. And now I've exposed my hyper-organized side. ; )
Okay, so in the app... what about the font size?? How do you know what size font is going to be the best and most legible font size? We all know that looking at your little iPhone screen is entirely different than having that printed page in your hand when you're done. This is another one of those things you have to decide for yourself because there are different print sizes (more on that here shortly) so smaller pages vs. larger pages makes a difference. Plus, we have different font styles. Plus, my eyesight is different than your eyesight. In general, and keeping in mind that I print my app pages 8x8, about a 9.0 font size works well -- for me.
TIP #24: Set up an experimental page! In the app, make a page that is purely journaling cards. It doesn't matter what you write, but write a whole bunch of stuff. Each journaling card is full of text. Each journaling card has a different font and / or a different size for the text. Print that page whatever size you're planning to print most of your app pages and there you go! When you see that printed page in real life, you'll have your answers as to what you feel is best for your text size on your app pages.
TIP #25: Just to be sure you understand... adjustments can be made to your text in the app. You can change the color, font style, size (we talked about that), spacing, vertical offset, and justification. In fact, if you're having a hard time sliding the slider to the exact place you want it to be, just tap on that number to the right of the slider, and it goes up by half number increments.
Wait -- what about your actual handwriting? Isn't that important?
Well, yes! It sure is! I am a believer that one's handwriting -- a piece of who they are -- should be preserved. But no, it doesn't have to be on every single scrapbook page. If that were a scrapbooking "rule" I would fail miserably because my hand cramps up so quickly from handwriting (true story), that I'd have to give up too easily. I have personally handwritten so much journaling in our scrapbooks over the years. My handwriting is very much preserved. So I'm not worried about that. Plus, I type faster than I handwrite, so typing is what I do! Well actually... mostly Siri when it comes to journaling on my scrapbook pages in the app. #SeriouslySoCool
TIP #26: Want to create pages in the app or digitally on the computer but still implement your handwriting? There's a solution for that! Leave the journaling cards empty and write on them after pages are printed! Just be sure you're using a pen that is meant to write on slick surfaces like photographic paper. My favorite? The Slick Writer by American Crafts.
completed pages
As we're working our way through all these tips and suggested details to be thinking about in whatever kind of scrapbooking you're doing, let's bring it back to one specific part of scrapbooking with the Project Life App. If you're not using the app, you can skip this part.
What happens to those completed app pages? Well -- you print them, of course! That's the whole point and you guessed it -- we'll come right back to that in a moment. But first, a few quick things to mention about those completed pages.
First of all, those pages automatically save within your app. Even if you're in the middle of a page and you need to take a call on that phone real quick... when you go back to the app, you'll find that "page in progress" safely hanging out in the library portion of the app.
Automatic saving is a beautiful thing. But here's what I want you to remember: Technology is technology. And technology, no matter how awesome it is, cannot always be trusted. So while I have complete faith in knowing the Project Life App is keeping all my pages safe & sound, I cannot control if my child accidentally deletes the app completely from my phone... or if something crashes by a total glitch... well, that's just no bueno.
I don't share this to cause you unnecessary fear. That's no way to live. But living in a prepared sort of way? I'm a fan of that, on a lot of levels. When it comes to anything technological, I have to assume something crazy might happen one day and I want to be prepared. This is why I have tangible scrapbooks! This is why I have backup of backups. And this is why I suggest you do the same with your precious app pages.
My routine: Every time I complete a page in the app, I export that page and save it to my Camera Roll. From there, I add it to a Photo Stream that is specifically for my app pages. I have this shared with David (my husband). I also keep these pages backed up in Dropbox. The double back-up plan. Makes me feel safe & secure.
TIP #27: Before exporting a page from the app, look everything over. Check for spelling errors. Make your list and check it twice... just like Santa.
When you go to export, and if you're working with the standard Project Life pages (which are square in format), you have the choice to export each page as an 8x8 or 12x12. You don't even have to think about dpi or anything technical to do with the resolution. We're taking care of all of that behind the scenes for you. You just need to know -- which size will you be printing this page?
TIP #28: If you're unsure about the printing size, go with 12x12 which will give you the highest resolution... just to be safe. You can always export it differently another time. Remember -- the pages are there in your app.
TIP #29: Something to always keep in mind with the app, if you ever, ever, ever have a question is this: That little green "i" on the home screen is saying "tap on me!" From there, you "report an issue" and the app will automatically generate an email to our app support team, telling them what device you're on, what version of the app you have, etc. Just tell us what your concern or question is, and our email response time is very quick on weekdays! We are here to help you.
It is worth noting that another feature we are working to add to the app is the ability to organize completed pages into folders. Won't that be wonderful! I already know I need a folder for our family yearbook (for each year), a folder for pages that I make for the kids' albums (remember - another topic, another day), a folder for the recipe pages I make in the app, a folder for gift pages. Yeah, that'll be super sweet. We pretty much have the best app developer ever, so he's working hard to make that happen. But first -- Android! *wink*
printing
Moving right along! Look at us flying through all this material! Okay, so yes. The ultimate goal with creating pages in the app or with Digital Project Life is to get them printed. Remember: We want actual, tangible scrapbooks in our hands. That's the point.
I mentioned that I print my app pages 8x8. This is why: I have a lot of 12x12 albums in our home. They're large. They take up a lot of real estate. And if I'm being honest, they're a bit heavy and bulky. I want my family to be inclined to pull scrapbooks from a shelf and not think twice about it. I want them to bring an album in the car if they want to look at it on the way to school. For these reasons, I have a personal preference for the smaller size.
Remember -- to each his own.
So why not 10x10? I've heard some of you inquire about this size and I'm happy to address it. I actually wanted to introduce this size into the marketplace years ago. And it just didn't "work," mostly for "retail reasons." And that's fine. When it comes to Project Life, 10x10 doesn't work in the physical format because of simple math. If the point is to keep it simple, then I should not be requiring you to print anything other than standard 4x6 prints, and I should not be requiring you to trim every picture. So there you go.
Back to the app pages. If we made 10x10 app prints available, you'd have to find 10x10 page protectors and 10x10 albums. They don't exist. We can create them, but that size just wouldn't be popular enough and when it comes to production, you have to produce a huge quantity of each individual product. There's no such thing as just trying "a few hundred of something." Now I'm getting all behind-the-scenes on business stuff.
Let me tell you something, and this is great news! We are bringing the option of printing PHOTO BOOKS to the app in the very near future -- hooray! This is positively brilliant for many reasons. I'm most excited because personally, my plan is to print a copy of our family yearbook in the form of a photo book, for each child... each year. So stoked about this. We are considering making the photo book size options 8x8, 10x10, and 12x12. Did you catch that? 10x10! More about that as we get closer.
Okay -- So how does one order individual page prints from the app? Ready for this?? At the bottom of the home screen, you see "order prints"? Tap there. The rest is so self-explanatory, and you are walked through every step of choosing your layouts and sizes and quantities. Yippee for easy-breezy!

TIP #30: Print as often as you'd like! I order every couple months so I save on shipping, and my order always includes my weekly pages and any recipe pages I've done.
What happens next? We ship your completed pages to you! This is my most recent package that just showed up this week actually. You can see the very sturdy packaging and protection, and what's hard to tell is that it's all securely shrink-wrapped too. No loosey-goosey prints floating around in there!


Getting a fresh batch of app pages is my happy place. Just flipping through them surely releases all sorts of happy endorphins!


I usually spread out my pages if there's a whole bunch and get them organized. Recipe pages over here, weekly pages over there... and I get things in order.
The most rewarding part? You guessed it! Slipping each and every page into a page protector, which goes into an album. Best. feeling. ever. A feeling of success!

Simply place those app pages in page protectors. No trimming required. They just slip right in. Only the best quality for your pages! We have Project Life page protectors in 12x12, 8x8, and a myriad of other sizes.
NOTE: At this moment, we are currently out of stock on 8x8. What? Why? When are they coming back? Well, I'm not into throwing anyone under the bus... so no need to go there. The lack of supply was unfortunately out of our hands, but the good news is that we have loads more on their way to us now and we expect those later this month (December). Thank you for your patience!

Soooo... how many pages fit in an album?
Great question, and here's the simple answer: Give or take a few, I find that 60 page protectors fit nicely in a Project Life 3-ring album. That goes for 12x12 or 8x8. That goes for traditional / physical Project Life pages and the same applies to digitally-created or app-created pages that are printed and slipped in page protectors, back-to-back (two prints slip into one page protector).
If you choose to embellish and get a little bulky on your pages... well, that number obviously changes and you'll have less pages fit in an album. But you already knew that.
TIP #31: Remember that in order to be a "scrapbooker," you are not required to cut, glue, embellish, sand, hammer, tie, or crochet your borders. I promise. So this talk of embellishing? Leave that for the long-timers who really dig it. I don't want any newbies thinking that's a requirement for quality scrapbook pages, k?
more time-saving tips
Obviously I've been sharing several tips & tricks throughout this post. Here are more thoughts on how I simplify. I love time-savers! For me, simple = DONE. Have I said that already? Women are notoriously good at making things more complicated than they need to be! I'm not exempt from that. So I've made a conscientious decision to do certain specific things that all "add up" to save me a lot of time & hassle.
TIP #32:Consistency is huge! Sticking with certain decisions throughout an album can be one of the biggest time savers ever in scrapbooking. If your priority is to get pages done faster, choose to be consistent with photo orientation, template or page layout design, font choices (style, size, color, etc.), square or rounded corners (in the app), background color, etc.
TIP #33: Stick with ONE Project Life collection per layout. I already talked plenty about Project 52; you know that I stick with that throughout an entire family yearbook. But when it comes to any kind of Project Life scrapbooking you do ... on the app, with physical product, making a page digitally on the computer... you will save yourself a lot of time by not searching and bouncing around between editions. We design collections intentionally. Everything within any given collection will look good together on a page, so we've eliminated the creative guessing game for those who aren't interested in playing it.
TIP #34: Make a decision and move ON! Oh my stars. If I had a dime for every time a scrapbooker made some small decision (which picture to use, which card to use, where to place what...) and then changed their mind about the decision... I'd be a ba-zillionaire! Stop second-guessing yourself. Choose. And move on. And you will magically be quicker at scrapbooking.
TIP #35: Save perfectionism for other areas of your life. This is not the place to get caught up in trying to be perfect. You are likely the only one putting pressure on you in the scrapbooking area of your life. Anyone else who gets to enjoy the fruits of your labors will not likely care a wink whether you spent 5 minutes or 5 hours on a page. So if I were you, I'd aim for closer to 5 minutes. Unless of course the creative therapy is truly what you need in your life (and I'm being sincere when I say that; another topic we won't go into today).
TIP #36: When you find yourself spending too much time deciding which pre-designed journaling cards go best on a page, and you just can't land on a decision ... stop right there. Project Life is meant to simplify the process. In those cases, just go with plain white (or plain grid or lined cards if using the physical product) and move on and feel good about that!
TIP #37: I mentioned photo editing earlier. Did you know you can do this right in the app? It's fairly basic -- lighten or darken, add or take away contrast -- but you know what? Give it a try and it might be just enough so that you can save yourself a step! Bring a photo into a page in the app, and you'll see the photo-editing (sliders) icon in the top left corner of the photo. Play for a few seconds and you'll see.
miscellaneous thoughts
MEMORABILIA
What about all the "stuff" you want to include in your scrapbook -- movie tickets, playbills, foreign currency, business cards, take-out menus, kids' art, certificates, awards, etc.? Two thoughts on that: First of all, I'm a fan of photographing stuff and scanning stuff. Takes up less space, and you still get to enjoy those items through printed pictures of the items or artwork.
Secondly, for the actual, real, original items that you must keep (and I think there are definitely gems worth keeping)... we have Envelope Pages for that very reason! Available in a variety of sizes, these are neutral and sturdy and a safe place to keep your little treasures. The spine of an Envelope Page has holes, just like our page protectors, so they fit right into your ringed albums.
HYBRID
Something to think about. This concept works for some, not for others. Hybrid scrapbooking is two or more "ways" of creating pages. Is that really okay, especially within the same album? Heck yes! If your future grandchildren are flipping through an album you made one day and one page is an app page, the next is a traditional creative scrapbook page, and the next is a Project Life page with photos and cards in pockets... do you think that grandchild is going to put the album back and say, "Uh, no thank you; I'm not interested?
"No! They're going to treasure every page you made because it's your pictures and your stories! That's why I celebrate every approach to scrapbooking! It doesn't matter how you get it done. Just get it done. And if you want to mix & match page styles within an album, do it.
now... back to you!
Let's wrap this up! Everything I've shared is based on my personal experience. I've broken everything down, shared what I do step-by-step, and shared more tips & tricks than I've ever squeezed into a single blog post. I want you to feel INSPIRED! I'm not suggesting you adopt my method if it doesn't really resonate with you. I'm suggesting you get personal.
I want you to be introspective right now.
At the end of the day, a scrapbook is a scrapbook. It doesn't really matter how it came together for anyone but YOU. Like I said, whoever will be looking at a finished scrapbook, will really care about the pictures and the stories. The effort YOU put into it is based on the experience that YOU want to have. Want it to be an elaborate, creative experience? Make it that. Want to get it done as quickly as possible? Make it that! More hours put into scrapbooking does NOT = "better" scrapbooks. That would be nonsense. This is the last time I will circle back to what I said earlier -- to each his own.
MY ADVICE
Begin with the end in mind. (I'm always quoting Stephen Covey.) What's your end goal? Think about the finished album size ... and type of album ... and method. Envision the experience you want to have during the process of putting together the scrapbook. What does it look like? What does it feel like? Envision what it will feel like to have that scrapbook done. Who is it for? Why are you doing it?
These thoughts are a great place to start. When you are able to have that end result in your mind, you are setting yourself up for total success. Scrapbooking success is right at your fingertips, my friend.
Go get it.
